


Install/Tutorials · Posted on
How to Wire Switches and Accessories on Your Toyota Tacoma
Table of Contents
Three simple solutions that make wiring easy
Adding accessories to your Toyota Tacoma is essential when transforming your truck into a modified Tacoma Beast. For many, though, the prospect of wiring accessories and switches is intimidating. Cutting and splicing wires is a daunting task and dealing with electricity comes with inherent risks. These deterrents are only accentuated by the high cost of many switch systems on the market.
If you want to wire switches and accessories on your Toyota Tacoma without cutting factory wires or breaking the bank, you have come to the right place. With the right products, some time, and a little know-how, you can have your accessories seamlessly powered in no time. The fitment is so precise that these switches will even look like they came from the factory.
With several options, including left of the steering wheels harness, below the head unit, and overhead, you have the flexibility to customize your Tacoma in the perfect way for your preferences. You can even use a combination of the above if you have multiple accessories or require more switches.
Read on for a detailed guide to easily wiring your Toyota Tacoma. By the end, you will know exactly how to install the right plug-and-play system for your needs, flawlessly integrating your accessories into an easy-to-use hub.

Wiring Harness Overview
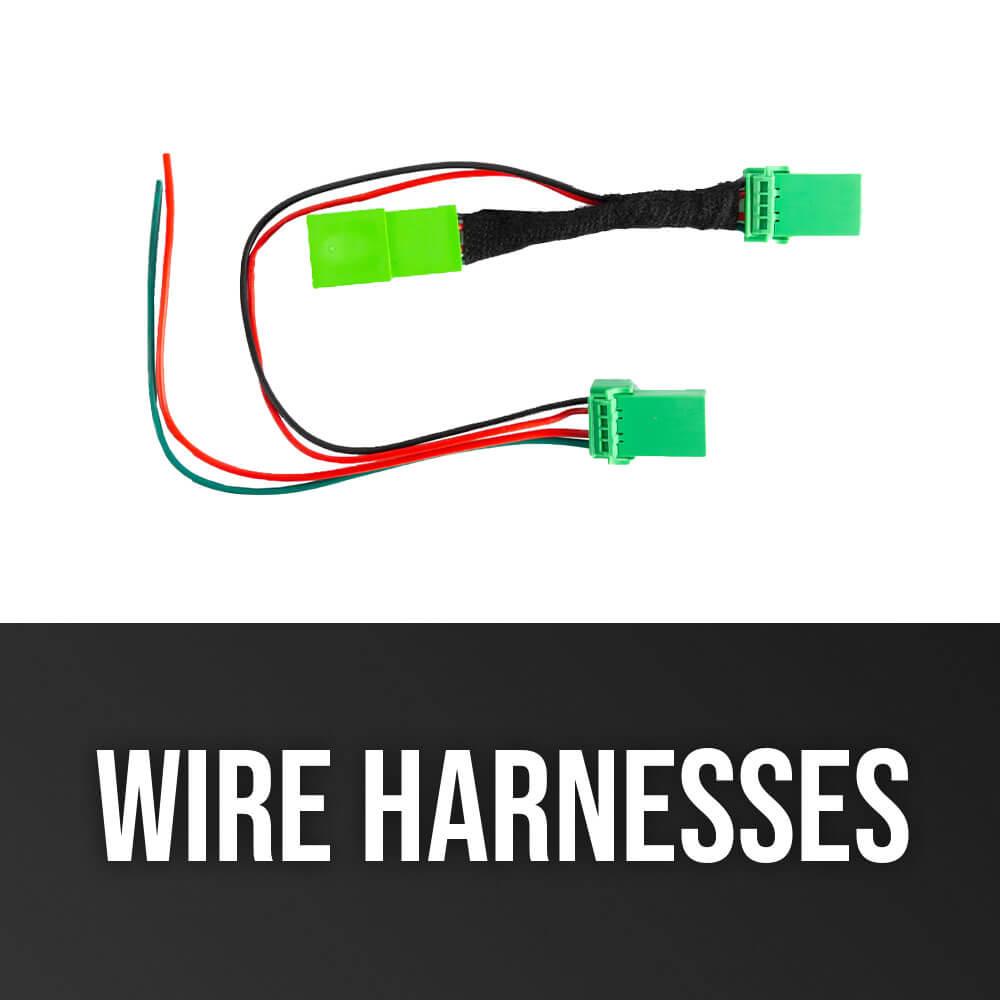
Every wiring harness bought from TacomaBeast includes a replacement green connector designed to replace the connector on the back of OEM-style switches. You can simply remove and throw away the connector from the switch and plug the green connector included with your harness in its place. Doing so hardwires your switch to another harness, providing dimmable illumination to the switch.
In other words, our harness allows you to connect directly to a preexisting factory switch, thereby assuming the illumination characteristics of that switch. You can then dim the new switch from the dimmer switch on your truck, which is exceptionally convenient and streamlined.
The two other leads included with the harness will also be used. The green lead connects to a 12v power source, typically a constant or keyed source of power. The red wire goes to your relay, which we will discuss in more detail soon.
Installing Toyota Tacoma Switches and Accessories
The first step in any wiring project is simple yet vital. Use a 10mm socket to disconnect the negative terminal from your battery. To make things even safer, you can place a towel between the terminal and the battery, ensuring they do not touch. Then, fold the towel over the terminal to prevent anything from dripping on or touching it.
This first step is essential, so do not skip it!
Installing Spade Terminals
Before we get to the specific wiring harnesses and how to install them in your Toyota Tacoma, we want to take a moment to discuss spade terminals. You will use these no matter what harness location you opt for, making them an important part of the installation process to understand and feel comfortable executing.
- Slide terminal sleeves onto the wires.
- Strip back some of the wire insulation.
- Crimp the spade terminals onto the end of the wires.
- Slide the cover over the terminals to protect them.
Installing Fuse Taps
The easiest way to power your switches is to use a fuse tap. By simply tapping into a factory fuse location, you can provide always on power to your accessory, even when the truck is off or opt for only keyed functionality of your accessory, when the truck is on or in accessory mode.
Using fuse taps is simple and will be done no matter how you choose to set up your switches and accessories. To install your fuse tap, follow the steps below.
- Locate the fuse box and remove the cover. All of the fuses, their amperages, and their locations will be printed on the cover, making installation of your fuse tap easy.
- If you want to key your accessories, consider the fuses for any outlet in your Tacoma that only works when the truck is on and the washer motor fuse for your windshield washer fluid.
- If you want your accessories to be functional even when your Toyota Tacoma is off, consider using the sunroof fuse or the door lock motor fuse.
Building a Switch Panel
If you have multiple Toyota Tacoma accessories that you want to control from one convenient location, a switch panel is the ideal solution. It centralizes all of your switches in one location, which not only gives you superb functionality but also looks great. Learn how to build your own switch panel by following the steps below.
- Start with the correct harness for the location you plan to use for your switches.
- Using a daisy chain harness to illuminate multiple switches. If you have five switches, for example, you will need a base harness and four daisy chains. You can add as many daisy chains as you need—they are infinitely expandable and require no splicing.
- Plug the first daisy chain into the green connector that comes with the base harness. You can then connect your other daisy chains into each other.
- Now, you can choose which switches go to which fuse location and run your wires to their individual relays. Color coordinating the relay wires is a good idea so you can determine the source of potential issues more easily.
Wiring Relays
Relays are a fantastic way to power your accessories, control them with a switch, and keep everything safe and tidy under the hood. They are also easy to use and installation is straightforward, making them an appealing option for Tacoma owners adding accessories to their trucks. Be sure to gauge all of your wires appropriately based on the amperage of your accessory and the distance you will be running the wire. There are tables to help with this.
- Run the wire from the switch harness to pin 86 on your relay.
- Run a ground wire from pin 85 to your ground location (chassis or negative battery terminal) and a power wire from pin 30 to your battery. Be sure to use an appropriate fuse or breaker, as determined by the amperage of your accessory, with your positive wire.
- Your positive accessory wire connects to pin 87.
- Your accessory ground wire can be attached to the chassis or the negative terminal of the battery.
Left of Steering Wheel Harness
- Before we jump into the installation of the left of steering wheel wiring harness for the Toyota Tacoma, it is important to note that it plugs into the cargo light harness. If your truck does not have the cargo light option, fear not—the connector is still hiding behind the trim panel to the left of the steering wheel.
- With a panel pry tool, pry outward from the top of the panel.
- When loose, the panel will easily fall out. Disconnect the auto high beam harness and cargo light harness (if equipped).
- With the panel free, locate the cargo light connector. Plug it into the new harness (you should hear a click).
- If you have the cargo light switch, the larger connector will plug back into it to retain factory functionality. If you do not have this switch, skip to the next step.
- Install your switch(es) into the switch panel.
- Plug the two-pin harness together, then plug the green connector directly into the switch.
- Install spade connectors on the two exposed wires.
- Measure and prep your wire that will go to the fuse box and relay, respectively. We prefer 20-gauge wire for relays and 12v sources. Color matching the wires is a good idea—green to the fuse box and red to the relay.
- Install spade mating connectors in the same fashion as the spade connectors. Plug the corresponding wires together.
- Feed the wires through the back of the panel. You should be able to pull them out near the gas pedal.
- Connect your 12v source wire (green) to your fuse tap using the same spade connector method. This will allow you to provide a minuscule amount of power to your switch.
- Determine whether you want your accessory to be functional at all times (including when the truck is turned off) or only when the vehicle is turned to the accessory mode or fully on.
- Run your green wire with the fuse tap to the fuse box. Remove the fuse you have chosen, add it to the bottom slot of the add-a-fuse fuse tap, insert a very small fuse to the top slot (in line with the wire), and plug the fuse tap back into the original fuse location.
- Guide your red wire through the firewall. You will need to use a tool to assist in this process. Wire hangers are a great option, but any small diameter, semi-flexible rod will work. You can secure the wire to your tool using electrical tape to make the process as easy as possible.
- Using your rod, poke a hole in the boot behind the brake pedal. Pull the rod through and into the engine bay. The wire will follow.
- Cut the wire to the proper length, leaving a bit of slack. Install a female spade connector to the end of the wire and connect it to pin 86 on your relay.
Beneath the Head Unit Harness
Positioning switches below the head unit in your Toyota Tacoma puts them in a convenient location for both you and your potential passengers. The streamlined appearance of switches placed in this location looks like it came directly from the factory, adding a visual appeal to this option.
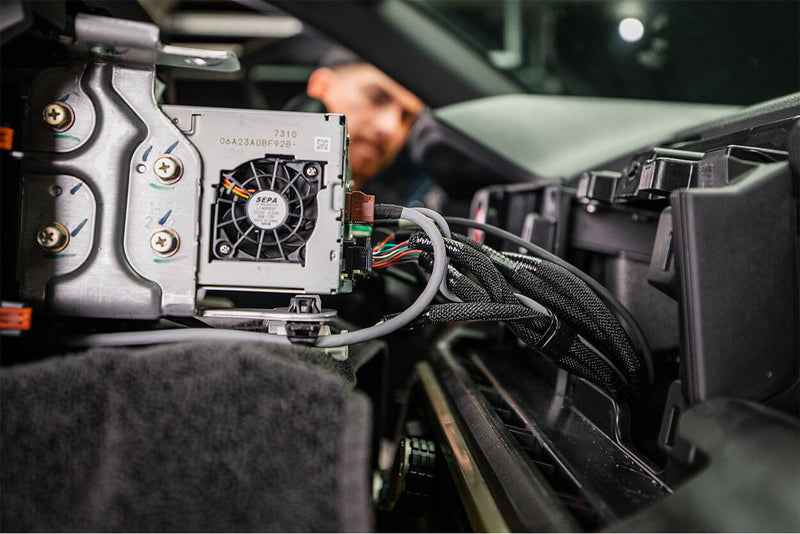
- Remove the head unit by pulling on the shroud surrounding the unit. Then, remove the four 10mm bolts surrounding the head unit and pull the unit straight out.
- Take a picture of the connectors on the back of the head unit. This will make reinstalling the connectors in the justifylocations easier when putting the unit back in place. Unplug the connectors by depressing the tab and pulling on the plastic portion of the connector, not the wires.
- Reach into the opening and behind the ridge containing the HVAC controls. Locate the ECT button, depress both the top and bottom tabs, and push the button out. You can do this simultaneously or by pinching the top tab first, then the bottom, removing the button in a rocking motion.
- Once the button is out of the panel, remove the connector and take the button off. Do not let go of the connector, as it can be challenging to retrieve.
- Plug the below-unit harness into the ECT button connector.
- Feed the two-pin connector into the panel in the direction of your new switch. Reach your hand back behind the panel and push the two-pint connector through the switch hole. Connect the switch harness to this connector to keep it accessible.
- Reinstall the ECT button with the new harness.
- Attach red and green wire lengths to the corresponding leads using the spade connector method.
- Feed the wires through the hole where your new switch will be mounted. Grab them from the back by reaching behind the panel. Find the best path you can to route your wires from this location to beneath the steering wheel.
- Route the wires to their appropriate destinations—the fuse box and through the firewall to the relay.
-
Reinstall your head unit and shroud.

Overhead Harness
Another fantastic location in Toyota Tacoma for switches is where the overhead console is located. This places the switches in a highly visible, easy-to-use location. Installation with the TacomaBeast overhead harness is quick and easy, making this a great Tacoma modification.
- Remove the overhead console by pulling it down. The clips holding it will release.
- Disconnect the single harness connected to the console.
- Plug the male end of the new harness into the factory harness.
- Route your fuse tap and relay wires through the headliner and behind the A-pillar trim. To do this, run the wires along the headliner, remove the A-pillar trim, and route the wires down toward the kick panel.
- To remove the A-pillar panel, use a pick, credit card, or something similar to wedge beneath the circular piece near the top. Pop it out and remove the 10mm bolt beneath it. Be sure that the negative terminal is removed from your battery, as there is an airbag behind the trim panel. Starting at the top, pull the panel away from the side and then pull upward.
- Fish the wire through the gap in the A-pillar. You can use a tool, like a wire hangar, to accomplish this by fishing upward from the kick panel, securing the wire to your tool, and pulling it back down.
- Once the wires are routed, zip tie the wires behind the looming to ensure they do not obstruct the airbag.
- Attach the wired you just ran to the wires included in the overhead harness. Install your switch into the panel, connect the harness, and reinstall the overhead console, tucking the wires out of the way as you do so.
- Run the wires identically to the other harness installations, ultimately arriving at the fuse box and through the firewall to the relay.
- Reinstall the A-pillar trim piece.
Checking Functionality
With your harnesses and switches installed, you will want to confirm that everything is functioning properly before putting everything back in its original place. Doing so will give you the peace of mind you need to use your new Tacoma accessories with confidence
- Reconnect the negative battery terminal.
- Start the truck, turn the light stalk to either parking mode or low beams, and ensure all the switches light up.
- Make sure your new switches are dimmable and in sync with the factory switches.
- Put everything back together as it should be—you are good to go!
We hope this in-depth guide to installing switches and accessories in your Toyota Tacoma was helpful. If you want a visual aid to follow during your installation process, be sure to check out the video on our YouTube channel. You can also contact us with any specific questions you may have and one of our Tacoma experts will assist you.
Remember, you can pick up all of the necessary wiring harnesses for your Toyota Tacoma switches and accessories at TacomaBeast your one-stop shop for all things Tacoma. With quality wiring solutions custom-made for your Tacoma, there is no reason you cannot conveniently control all of your accessories on a budget. If you need guidance selecting the right Tacoma accessories for your build, we will gladly help you choose the perfect pairing for your purposes!


![Best Toyota Tacoma Infotainment System Upgrade - Stinger Heigh10 [Complete Review & Installation]](http://tacomabeast.com/cdn/shop/articles/BLOG-POST-IMG-001_9dc965ee-4133-4d8d-bcf5-34096330c7a6.png?v=1758870800&width=800)


Leave a comment