


The Best Toyota Tacoma Seat Covers
Table of Contents
How to install PRP’s Toyota Tacoma Seat Covers
Keeping your factory Toyota Tacoma seats in good condition is easier said than done, especially when you are an off-roading-loving, passionate-life-living, good-time-having adventurer. Whether you enjoy caking the interior of your truck in mud or your daily life seems to always be accompanied by messes, opting for premium, easy-to-clean covers is essential.
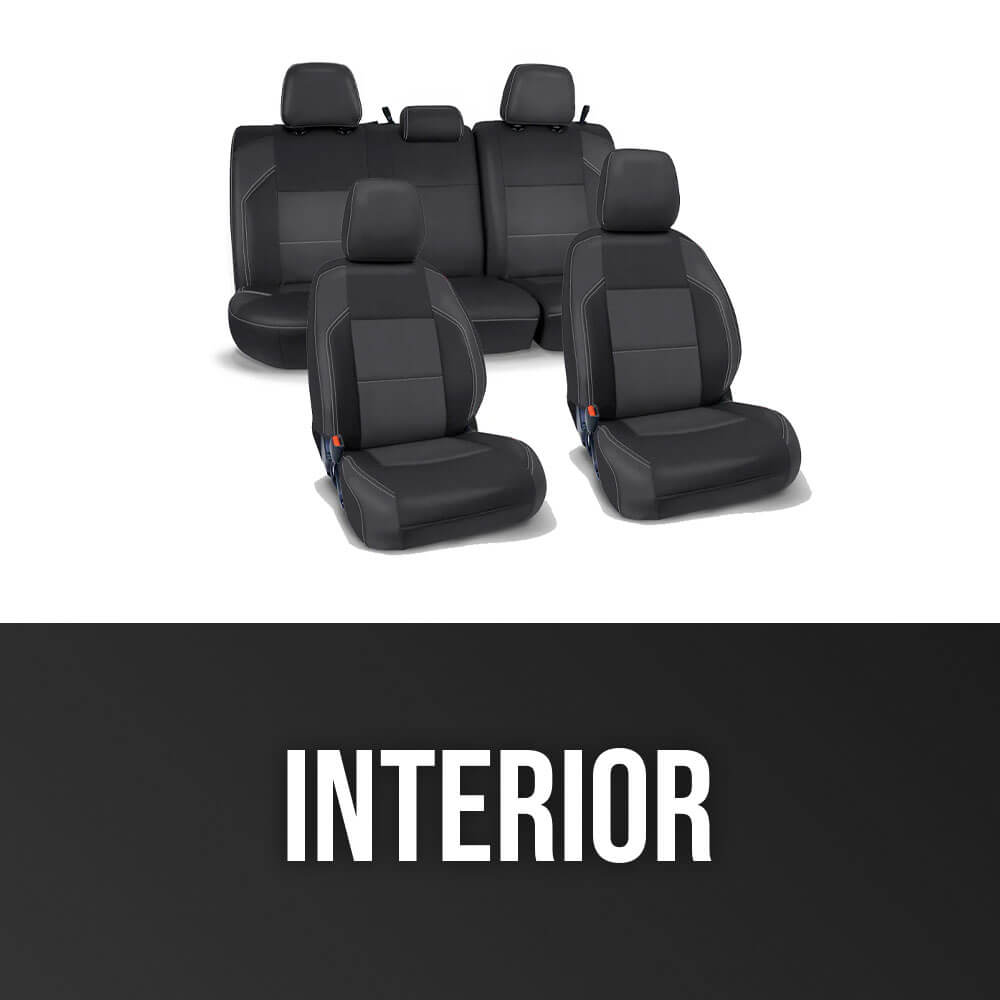
The Best Seat Covers For Toyota Tacoma
PRP’s Toyota Tacoma Seat Covers are ideal for neutralizing sweat after the gym, making pet hair easy to remove, and otherwise keeping your truck interior as fresh as possible. Equally as exciting are the numerous options PRP offers, giving you the opportunity to select the perfect combination for your Tacoma.
You can opt to cover the two front seats, the two front seats and center console, the two front seats and the back seats, or all the seats and the center console. From there, you can choose your color combination. Black is the primary color, and you can select black stitching, red stitching, or gray stitching to complement it.
The covers are constructed of marine-grade vinyl—the same stuff used in water applications. In other words, these seat covers can endure whatever you or the elements (or your kids) throw at them while remaining easy to clean. They even feature UV protection to ensure the color does not fade, as well as anti-bacterial and anti-fungal additives.

Installing the PRP Toyota Tacoma Seat Covers
Given the exceptional quality of the PRP Tacoma Seat Covers, it is no surprise that the installation process is easy and straightforward. In just a few simple steps, you will be enjoying your new seat covers and experiencing the peace of mind that comes with PRP protection. As a bonus tip, you may want to consider investing in a plastic pry tool—it makes an already easy installation even easier.

Front Seat Covers Installation
Before you begin installing the front seat covers, take a moment to identify the driver and passenger side covers. The driver’s side will have an airbag opening on the left side, while the passenger’s side will have the opening on the right side.
Once you have identified which cover goes where, it is time for the fun part—installing your PRP Seat Covers for your Tacoma!
There are three components for each front seat—a cover for the bottom cushion, top cushion, and headrest. Before you fit any of these pieces to the seat, you will need to unclip two tabs beneath the front seats. This will allow the flap on the lower portion of the factory seat to be tucked into the PRP seat covers at the appropriate time. You will also want to remove the headrests at this time.
Bonus Tip: Leaving your seat covers in direct sunlight before starting the installation will make them more flexible and easier to work and manipulate!
Installing the Bottom Cushion Cover
- Untie the rope attached to the bottom cushion cover.
- Slide the cover over the bottom cushion. You will have to work with the fabric to make it fit properly.
- Tuck the fabric beneath the plastic protector on the seat and behind the seatbelt.
- Push the rope you untied in Step 1 toward the rear of the vehicle. It should go behind the seatbelt and lever, as well as between the upper and lower portions of the seat.
- Once the bottom cover is in position (the knob on the outside of the seat is a good indicator—it should nicely fit in the cutout of the cover), push the flap between the upper and lower portions of the seat.
- Work around the seat, tucking the cover into the plastic trim along the bottom.
- Pull the ropes and flap that you have pushed to the rear to help further align the cover.
- Make any necessary adjustments to align the cover perfectly with the bottom factory seat cushion.
- Fold the factory seat flap up and inside the back of the seat. Make sure it does not bend or fold once it is tucked away.
- Take the rope you tucked toward the back and guide it through the tabs on the rear of the seat cover. Pull both ends tight and make a secure knot.
Installing the Top Cushion Cover
- Fit the PRP Seat Cover over the top of the seat. It will be snug.
- Make sure the airbag opening is positioned correctly. It should face the exterior of the vehicle.
- Push the fabric flap in the front through the gap between the upper and lower portions of the seat. Using the seat recline lever can be helpful.
- In the rear, connect the bottom and top seat cover flaps. They use a hook-and-loop fastener, making this step simple.
- Make sure the flap in the rear is then pulled down to cover the lower portion of the seat.
- Don’t worry about any wrinkles in the material. The sun will remove them and cause the cover to conform to the seat over time.
- Work the seat cover fabric around and under the headrest mounts on top of the seat.
- Starting at the top and working toward the bottom, tuck the excess fabric at the airbag opening into the cover. This will hide the excess fabric while retaining the functionality of your airbags.
Installing the Headrest Cover
- Reinstall the headrest onto the seat.
- Slide the headrest cover over the headrest.
- Connect the Velcro underneath the headrest.
- Fold the front and rear flaps and connect them using the Velcro fasteners.
- If accomplishing Steps 3 and 4 is too difficult with the headrest attached, simply remove it, complete Steps 3 and 4, and reinstall the covered headrest.

Rear Seat Cover Installation
With the PRP Tacoma Front Seat Covers installed, it is time to move on to the rear seats. In the back, you will have two seat sections—a single seat on the driver’s side and a bench seat. You will install the backseat seat covers for your Toyota Tacoma one at a time, starting with the driver’s side.
The rear seats are the easiest part of the entire installation. Check out our guide below to make your PRP Seat Cover install go as smoothly as possible.
Installing the Driver’s Side Rear Seat Cover
- Lift the bottom portion of the seat and fit the PRP Seat Cover over the cushion as if you are putting sheets on a bed.
- Ensure the cover is flush all around the cushion. Then, pull on the cords in the rear and make a secure knot. Tuck the knot and excess cordage into the cover.
- Remove the headrest.
- Take the top cushion cover and fit it over the seat. Be sure to properly align the three openings on the top of the seat cover with the headrest mounts and strap, respectively.
- With the cover installed, make sure the seatbelts are accessible. Then, take the excess fabric at the bottom front and push it through the gap toward the rear.
- With the seat folded down, pull the flap you just pushed through. Remove both Velcro protector straps from the seat cover before securing the cover and flap together.
- Fit the opening at the top of the seat cover over the headrest mounts. Install the headrest cover over the headrest, secure all of the Velcro fasteners, and reinstall the headrest.
Installing the Rear Bench Seat Cover
- The bottom cushion cover installs exactly the same way as the driver’s side backseat cover was installed.
- With the bottom cushion cover installed, remove the headrest.
- Using a 14mm socket, remove the seatbelt where it attaches to the floor.
- There is a zipper along the back of the upper cushion seat cover. Make sure it is unzipped before installation.
- There is a gap between the end of the zipper and the PRP Seat Cover. Feed the seatbelt through this slot before beginning the installation of the upper cushion cover.
- Slide the seat cover over the upper portion of the seat. With the zipper fully unzipped, this should be easy.
- Push the flap at the bottom of the cover from front to back through the gap in the seat.
- With the seat folded forward, pull the flap. Then rezip the zipper.
- Remove both Velcro protectors along the bottom of the back of the seat cover.
- Fasten the flap to the seat cover using the attached Velcro. It is easier to start in the center and work toward the outer edges.
- Tuck the cover beneath the headrest mounting brackets. Be sure to pull the tab out through the opening in the seat cover so you can fold the seat down.
- Reinstall the seatbelt.
- Install the headrest covers and reinstall the headrests.

Center Console Cover Installation
The installation of your PRP Toyota Tacoma Seat Covers is nearly complete. All that is left is to install the PRP Center Console Cover. While small, this piece really completes the custom interior look and ties the whole package together.
Installing the Center Console Cover
- Open the console. Starting at the front of the console, fit the cover over it with the opening for the latch handle facing forward.
- The console cover fits very tightly, so you need to stretch the fabric thoroughly.
- Once you have positioned the console cover so that it is aligned and flush, firmly secure the Velcro straps to keep it in place.
The Toyota Tacoma PRP Seat Covers transform your interior into a luxurious, easy-to-clean, custom space that looks as great as it performs. We hope that our detailed installation guide helps you as you outfit your Tacoma for daily life and, of course, adventure.
For a video version of this PRP Toyota Tacoma Seat Cover installation guide, be sure to check out our YouTube channel. In the meantime, feel free to browse our website, where you will find all of the Tacoma accessories and information you could ever need. If you have specific questions, you can even reach out to us and speak with an experienced Toyota Tacoma expert!
Let us know what you think and leave a comment below!
2 comments


Elevate the style and protection of your Toyota Tacoma with high-quality seat covers! Experience the perfect combination of comfort and durability for your tough vehicle.
How much are these seat covers?
Leave a comment